Immersive Surround Sound for a Rectangular Living Room
Table of Contents
- Map Your Rectangular Room for Immersive Sound
- Surround Sound Speaker Placement in a Rectangular Room
- Subwoofer Placement in a Rectangular Room for Deep Bass
- Choosing the Right Surround Sound System or Soundbar
- Surround Sound Calibration: Dialing In Your Receiver
- Room Acoustics for Home Theater: Taming Reflections and Echo
- Solving Open-Plan Layouts and Awkward Obstacles
- Frequently Asked Questions
Last Updated: October 4, 2026
Map Your Rectangular Room for Immersive Sound
You do not need a perfect room to get great audio. You need a plan. At JoeMo Promo, we help people turn everyday living rooms into real home theaters. This guide shows you exactly how to achieve immersive surround sound in a rectangular living room, even if the space is small or oddly laid out.

Room shape matters more than room size, and a rectangular room gives you predictable sound behavior. Here is the core idea behind everything that follows:
- Symmetry wins. Speakers placed evenly around your seat create a balanced sound field.
- Distance matters. Equal distance from your ears to each speaker keeps timing consistent.
- Soft surfaces help. Carpet and drapes absorb reflections that muddy dialogue.
Why Room Shape Matters More Than Room Size
Square rooms are the enemy of good sound. Sound waves bounce between parallel walls at the same distances, stacking into boomy peaks and dead spots called standing waves.
Room proportions change how bass behaves: a long, narrow room pushes bass energy down its length, so the back wall often sounds heavier than the front.
You can work with a rectangle, just avoid placing your seat dead center, where room modes cancel out.
Finding the Listening Position and Sweet Spot
The listening position is where your ears sit relative to the screen and speakers. Everything else gets measured from this one spot.
Start here:
- Sit about two-thirds of the way back from the screen.
- Center yourself between the two side walls.
- Keep your head roughly at ear height with the speakers.
Avoid the exact middle of the room, where bass cancels most.
Surround Sound Speaker Placement in a Rectangular Room
Speaker placement is the single biggest factor in how immersive your system feels. Move a speaker a foot and the whole soundstage shifts. The goal is a circle of sound around your seat, not a wall of noise in front of you. Here is a room-specific plan you can lay out on the floor before you drill anything.
Start With the Listening Triangle
Everything in a rectangular room is measured from the listening position, not the walls. Set your seat first, then build outward.
- Front left and right: Place them so the angle between your head and each speaker is 22 to 30 degrees off center. In practice, that means the two front speakers and your head form an equilateral triangle. If your ears are 9 feet from the screen, the left and right speakers should sit roughly 9 feet apart, angled inward about 15 to 20 degrees toward your seat.
- Center channel: Directly above or below the screen, aimed at ear height. Keep it within 1 to 2 feet of the left/right tweeter height so pans across the front stage do not jump.
- Surround left and right: 90 to 110 degrees off center, just behind and beside your ears, mounted 1 to 2 feet above ear level and angled down toward the seat.
Adapting the Layout to Room Proportions
A rectangle is not one shape. A long, narrow room and a short, wide room need different compromises.
| Room Proportion | Front Stage | Surrounds | Notes |
|---|---|---|---|
| Long and narrow (length > 1.6x width) | Pull left/right speakers in so the triangle stays equilateral | Side walls are close, so mount surrounds slightly higher and angle down more | Bass piles up at the back wall, keep the seat forward of it |
| Short and wide (width > length) | Push left/right speakers wider for a bigger stage | Side walls are far, consider bipole/dipole surrounds or in-ceiling | Watch side-wall reflections; treat first reflection points |
| Near-square (within 10%) | Keep the triangle tight and centered | Symmetry is critical, measure both sides | Worst case for standing waves; seat off-center |
Adding Height Channels for Dolby Atmos
A 5.1 or 7.1 bed gives you a horizontal ring of sound. Dolby Atmos adds a vertical dimension with height or overhead speakers, making rain, flyovers, and ceiling creaks feel overhead. Two layouts work in a rectangle:
- 5.1.2: Two height speakers mounted high on the front wall above the left/right, angled down at the seat. Easiest retrofit.
- 5.1.4: Four height speakers, two front, two rear, for a fuller dome. Needs more ceiling or upper-wall real estate.
If you cannot mount overhead, upward-firing modules that bounce sound off a flat ceiling are a practical alternative, best with ceilings 8 to 10 feet and a seat within about 10 feet of the modules.
A Layout You Can Tape Out Today
- Mark your seat on the floor.
- Measure from the seat to the screen; that distance is your triangle side.
- Tape an equilateral triangle on the floor for the front three.
- Tape a line 90 to 110 degrees off center on each side for the surrounds.
- Walk the room and listen before you commit to brackets.
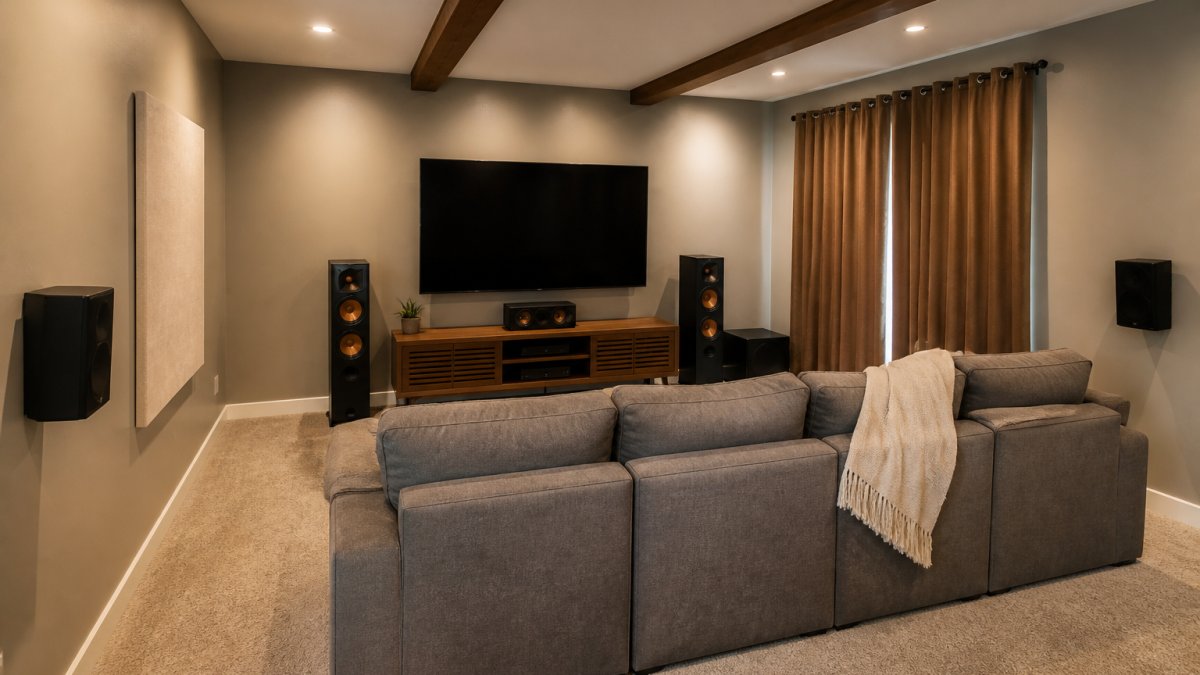
Front Stage: Left, Center, and Right Channels
The front three speakers carry almost all your dialogue and on-screen action. Get them right and everything else falls into place.
- Place the left and right speakers at equal distances from the screen and from your seat.
- Angle them slightly inward, about 15 to 20 degrees, toward your seat.
- Keep the center channel as close to ear height as possible, with its tweeter aligned with the left/right tweeters.
A common mistake is mounting the center speaker too high or too low, so voices seem to come from the ceiling or floor instead of the actors' mouths. If your TV sits on a console, tilt the center channel so it fires at ear height.
Surround and Rear Speakers for 360-Degree Audio
Surround speakers create the wrap-around effect that makes you feel inside the scene. In a rectangular room, mount them on the side walls just behind and slightly above your ears.
Three rules keep the effect convincing:
- Keep surround speakers 1 to 2 feet above ear level, angled down toward the seat, never directly overhead unless you are running a height-channel system.
- Angle them toward the listening position, not straight across the room.
- Match the distance from your ears to each surround so timing stays consistent.
For a true 360-degree audio feel, add rear speakers behind the seat if your room depth allows at least 3 feet of clearance. If not, side surrounds alone still deliver a strong effect, and a 5.1.2 height pair adds more immersion than rear surrounds in a shallow room.
Subwoofer Placement in a Rectangular Room for Deep Bass
Subwoofer placement in a rectangular room is more art than science. Bass waves are long and behave differently from higher frequencies, so the sub rarely sounds best where it looks best.
Try this method:
- Place the subwoofer in your seat.
- Play a bass-heavy track.
- Walk the room's front corners and walls.
- Put the sub where the bass sounded fullest.
Corners boost bass output but can sound boomy. A spot along the front wall, about a quarter of the way in from a corner, often gives the cleanest low end.
Choosing the Right Surround Sound System or Soundbar
The best system fits your room and your habits. A full 5.1 setup gives you the most control and the most immersive result. A soundbar is simpler and tidier, but it cannot match true surround speakers for a wrap-around sound field.
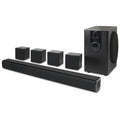
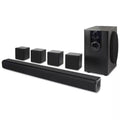
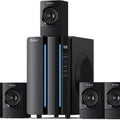
iLive 5.1 Surround Sound System →
Here is how the two compare:
| Option | Best For | Setup Effort | Immersion Level |
|---|---|---|---|
| Soundbar | Small rooms, renters | Very low | Moderate |
| 5.1 speaker system | Dedicated media rooms | Moderate | High |
| Wireless 5.1 system | Clutter-free setups | Low | High |
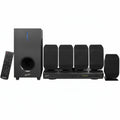
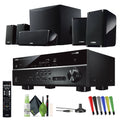
For most rectangular living rooms, a 5.1 system is the sweet spot. JoeMo Promo carries the iLive 5.1 Surround Sound System at $519.99, which pairs with your TV, phone, or streaming box, so dialogue stays crisp and explosions actually rumble. If you want a bigger front stage, the iLive Cinema Series 5.1 Speaker System at $499.99 uses a full-size center speaker and four satellites for a wider sound field.

For a wired, no-fuss option, the iLive Home Theater System with Learning Remote at $509.99 includes six speakers and one remote that controls your whole setup.

Surround Sound Calibration: Dialing In Your Receiver
Surround sound calibration tells your receiver where each speaker sits, how loud it should play, and which frequencies it should handle. Skip it and even a great system sounds off. Here is the full sequence, speaker size, crossover, distance, level, and what to change when something sounds wrong.
Step 1: Set Speaker Size and Bass Management
Your receiver needs to know which speakers handle deep bass and which hand it off to the subwoofer.
- Small vs. large: Set every speaker to "small" unless it has a woofer of 6.5 inches or larger and plays cleanly below 50 Hz. "Small" routes bass to the sub, which is almost always the better choice in a rectangular room.
- Crossover: Start at 80 Hz, the standard handoff point for bookshelf and satellite speakers. If your speakers are tiny, raise it to 100-120 Hz; if they are large towers, try 60 Hz.
- LFE + Main: Leave this off unless you know why you want it. Doubling bass to both speakers and sub usually muddies the low end.
Step 2: Set Distances
Distance settings tell the receiver how long to delay each channel so sound from all speakers reaches your ears at the same time.
- Measure from your head, not the wall, to each speaker.
- Enter the distance in feet (most receivers use feet; some use meters).
- The subwoofer distance is often set longer than the physical distance because of the sub's internal processing delay. Trust the auto setup here, or add 1 to 2 feet if bass feels late.
Step 3: Match Levels
Level matching makes every channel play at the same loudness at your seat.
- Sit in the listening position.
- Use the receiver's built-in test tones.
- With a sound level meter app, set each channel to about 75 dB (C-weighted, slow response).
- Set the subwoofer 3 to 6 dB hotter than the other channels if you like movie-style bass; keep it flat for music.
If you have no meter, use the receiver's auto calibration mic and then fine-tune the sub by ear with a familiar bass-heavy scene.
Step 4: Run Auto Room Correction
Most modern receivers include a room-correction system, Audyssey, Dirac, YPAO, MCACC, or AccuEQ, depending on brand. These use a microphone to measure how your room colors the sound and apply correction.
- Place the mic at ear height at your seat for the first measurement.
- Take additional measurements 1 to 2 feet around the seat, not across the whole room.
- Keep the room quiet during the sweep, HVAC, fans, and traffic noise skew results.
Step 5: Verify and Adjust by Ear
Play three test scenes and listen for specific problems:
| What You Hear | Likely Cause | Fix |
|---|---|---|
| Dialogue buried in action | Center channel too low | Raise center 2-3 dB |
| Effects jump from side to side | Surround levels uneven | Re-check levels and distances |
| Bass boomy or one-note | Sub too hot or corner-loaded | Lower sub 2-3 dB, pull it from the corner |
| No sense of overhead | Height channels too quiet or aimed wrong | Raise height level 2 dB, re-aim down at seat |
| Everything sounds thin | Crossover too high | Lower crossover to 80 Hz |
A common mistake is leaving the center channel too quiet. Raise it a notch or two if dialogue gets lost during action scenes. Another is trusting auto setup blindly, always verify with content you know well.
Room Acoustics for Home Theater: Taming Reflections and Echo
Room acoustics for home theater come down to one problem: sound bouncing off hard surfaces. Bare walls, tile floors, and big windows reflect sound back at you, smearing dialogue and blurring detail.
The fix is soft materials, and you likely own most of them already:
- Area rugs and carpeting to kill floor reflections
- Heavy drapes over windows and glass
- Plush seating and cushions to absorb mid-range
You do not need a treated studio. Cover the first reflection points, the spots where sound bounces off the side walls to your ears, and the room will tighten up fast.
Solving Open-Plan Layouts and Awkward Obstacles
Open-concept rooms and odd obstacles do not ruin surround sound. They just change where you place things.
Work around these common problems:
- No back wall: Use side surrounds only and angle them toward the seat.
- A doorway in the way: Shift both surround speakers forward to keep them symmetrical.
- Furniture blocking the path: Raise surround speakers slightly so sound clears the sofa back.
Symmetry matters more than perfection. If one speaker must move, move its partner the same distance so the sound stays balanced.
Getting immersive surround sound in a rectangular room is a puzzle with a clear solution: smart speaker placement, a well-placed subwoofer, proper calibration, and a few soft surfaces to tame reflections.
Frequently Asked Questions
What is the 38% rule for room acoustics and does it apply to surround sound?
The 38% rule suggests placing your listening position roughly 38% of the room's length from the front wall to reduce standing waves and uneven bass. In a rectangular room, this means if your room is 20 feet long, you would sit about 7.6 feet from the front wall. It is a starting point for surround sound speaker placement, not a strict requirement. Adjust based on what sounds best to your ears and use a calibration microphone to fine-tune.
How far should surround speakers be from the listening position in a rectangular room?
Surround speakers should sit roughly 1 to 2 feet above ear level and about 2 to 3 feet behind the listening position, angled slightly inward. In a rectangular room, mount them on the side or rear walls at a distance that creates a 110 to 120-degree angle from the front stage. This positioning helps deliver 360-degree audio without localizing sound to a single speaker.
Where should a subwoofer go in a rectangular living room for the best bass?
Start with the subwoofer in a front corner of the rectangular room, about 1 to 2 feet from each wall. Corners reinforce low frequencies but can cause boomy bass. Try moving it along the front wall or to a side wall to find the smoothest response. A wireless subwoofer gives you flexibility to test multiple spots without cable runs. Use a calibration mic or test tones to confirm the best spot.
Do I need a separate receiver to calibrate surround sound, or can a soundbar handle it?
A soundbar with automatic room calibration can handle basic surround sound calibration, but a dedicated AV receiver offers more precise control over speaker levels, distance, and EQ. Receivers with room correction software like YPAO or Audyssey measure your rectangular room's acoustics and adjust each channel accordingly. If you want immersive sound without a receiver, choose a soundbar system that includes calibration features and wireless subwoofer support.