How to Avoid Projector Image Blur: A 2026 Guide
Table of Contents
- Why Projector Image Blur Happens: The Common Causes
- How to Adjust Projector Focus for a Crisp Picture
- Optimal Projector Throw Distance and Placement
- Projector Lens Cleaning Guide: Step-by-Step
- Fixing Blur from Keystone Correction and Image Distortion
- Signal, Source, and Firmware Fixes for Blurry Images
- Environmental Factors: Ambient Light, Heat, and Dust
- Conclusion
- Frequently Asked Questions
Last Updated: September 10, 2026
Why Projector Image Blur Happens: The Common Causes
Projector image blur is the loss of edge definition and fine detail that makes text look soft and faces look smeared. It almost never has a single cause: it comes from a drifted focus ring, a dusty lens, a mismatched throw distance, or a signal arriving at the wrong resolution.
The fix depends on which one you're dealing with, and that's where most troubleshooting goes wrong, people crank the focus wheel when the real problem is a 720p stream feeding a 1080p projector.
At JoeMo Promo, new home theater owners ask us: "Why does my picture look soft when the projector says it's sharp?" Here's the diagnostic order that works, starting with the cheapest checks.

How to Adjust Projector Focus for a Crisp Picture
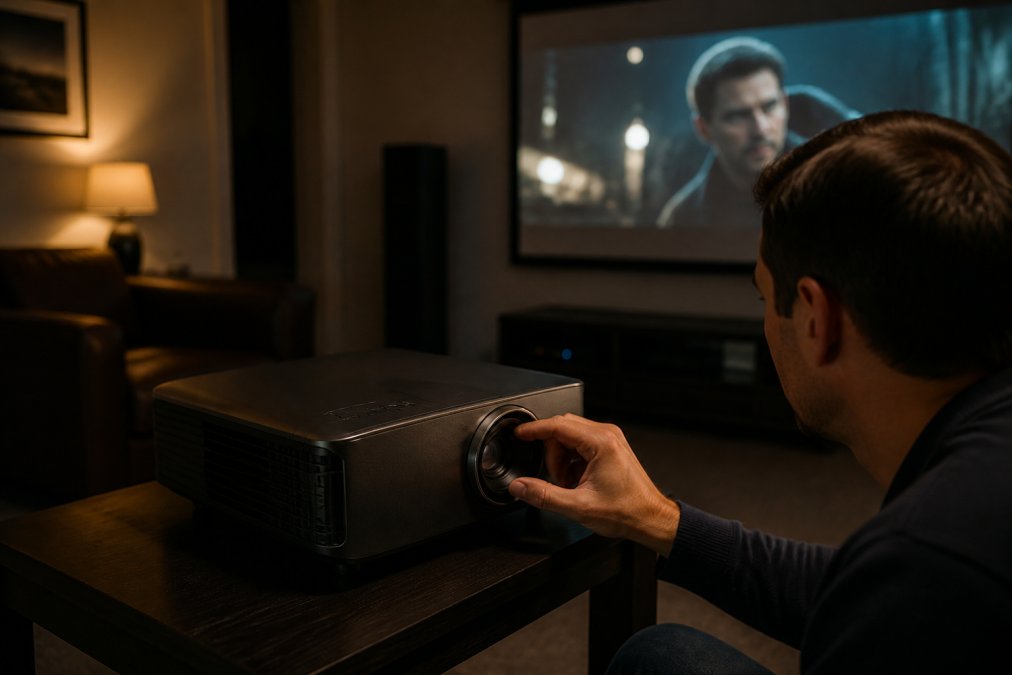
Start with the focus ring, but only after confirming the lens is clean and the source resolution matches. Adjusting focus on a dirty lens just sharpens the smudge.
Using the Focus Ring and Auto-Focus Features
Manual focus rings have a hard stop at each end of their travel. If yours spins freely past the sharp point, the internal gears are worn or the ring has slipped, a hardware issue, not a settings issue.
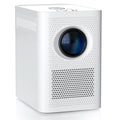
Auto-focus systems project a test pattern, measure the reflection, and drive a motor to the calculated position. On models with automatic focus and keystone correction, like the Nova 300 Smart Home Theater Projector, the alignment cycle takes seconds. If auto-focus keeps hunting, the room is too bright or the surface too low-contrast for the sensor.
When to Use Digital Zoom vs. Optical Zoom
This is the most misunderstood projector setting and the top cause of blur that no focus adjustment will fix.
Optical zoom moves lens elements physically, resizing the image without touching pixel count, so sharpness stays intact.
Digital zoom crops the image and scales the remaining pixels up. You lose real resolution with every step, a 1080p projector zoomed to 1.5x displays a softer, upscaled image, which is what pixelation and soft edges look like in practice.
The rule: use optical zoom or physical placement to size your image. Treat digital zoom as a last resort for quick fixes, never as a permanent setting.
Optimal Projector Throw Distance and Placement
Throw distance, from the front of the lens to the screen, determines image size and sharpness. Get it wrong and you'll fight blur forever.
The critical spec is throw ratio: distance divided by screen width. A 1.5:1 projector needs 1.5 feet of distance per foot of screen width, 12.5 feet from lens to wall for a 100-inch wide screen.
Throw Ratio and Screen Size Calculations
Here's the formula to work backward from your room:
Required distance = Screen width × Throw ratio
For a 12-foot-deep room, divide 144 inches by the throw ratio: a 1.5:1 unit gives a 96-inch wide screen, while a 0.5:1 short-throw gives 288 inches in the same space.
That's why short-throw and ultra-short-throw models exist: they solve the small-room problem without digital zoom.
| Room Depth | Throw Ratio | Max Screen Width | Typical Use |
|---|---|---|---|
| 8-10 ft | 0.5:1 (short throw) | 192-240 in | Small living rooms |
| 10-12 ft | 1.2:1 | 100-120 in | Standard media rooms |
| 12-15 ft | 1.5:1 | 96-120 in | Dedicated theaters |
| 15+ ft | 1.5-2.0:1 | 90-120 in | Long rooms, rear placement |
Vertical Offset and Lens Shift: The Spec Nobody Checks
Throw ratio says nothing about where the image lands vertically, the source of most placement-related blur.
Every projector has a vertical offset, the percentage of image height above or below the lens axis when level. A 100% offset throws the entire image above the lens; 0% centers it. Mount at the wrong height and you'll tilt the projector, triggering keystone correction and its softness.
Lens shift is better: it moves optical elements inside the housing, repositioning the image without tilting or digital correction. Use it before keystone; if your projector lacks it, move the mount until the lens is level with the screen's vertical center.
A common pattern: the projector is mounted too high for convenience, tilted down, and compensated with 15 degrees of keystone. The picture is square but corners are soft and focus drifts top to bottom. Lowering the mount six inches and zeroing keystone fixes it.
Screen Geometry and Focus Uniformity
Focus isn't uniform across a projected image. Even a perfectly placed projector shows slightly softer corners than center on a flat screen, because lens-to-screen distance is longer at the edges. This is normal and usually invisible.
It becomes visible when three things stack up:
- The screen is not flat. A pull-down screen with waves or a painted wall with texture will pull parts of the image in and out of focus. Tensioned screens exist for this reason.
- The projector is off-axis. Angling the projector left, right, up, or down increases the corner-to-center distance difference and exaggerates soft corners.
- The screen is curved. Curved screens are designed for specific throw ratios and seating positions. Using one with the wrong projector makes edge focus worse, not better.
Placement height matters: keep the lens level with the screen's vertical center, or as close as mount and lens shift allow. Angling the projector forces keystone correction, which always costs sharpness.
Projector Lens Cleaning Guide: Step-by-Step
A dirty lens is the most common cause of a soft image that won't focus, and the easiest to fix. Dust, fingerprints, and film residue scatter light before it reaches the screen.
What you need:
- A microfiber cloth (lens-safe, lint-free)
- A bulb blower or compressed air
- Lens cleaning solution or pre-moistened lens wipes
- A can of compressed air for the vents
The steps:
- Power the projector off and let it cool completely. Lenses get hot.
- Use the bulb blower to remove loose dust. Never wipe a dry, dusty lens.
- Apply a small amount of lens cleaner to the microfiber cloth, never directly to the lens.
- Wipe in a gentle circular motion from the center outward.
- Inspect under a light. Repeat with a fresh section of cloth if streaks remain.
- Clean the intake and exhaust vents with compressed air.
Tools You Need and Mistakes to Avoid
More mistakes to avoid: spraying cleaner directly on the lens lets liquid seep in and cloud internal optics; cleaning a hot lens can crack the coating; and skipping the vents lets dust inside the chassis land on the lens from behind.
Fixing Blur from Keystone Correction and Image Distortion
Keystone correction fixes a trapezoid-shaped image by digitally warping the picture. Every degree resamples pixels and softens edges.
Above roughly 10 degrees, you're trading noticeable sharpness for a square picture (projectorcentral.com). The better fix is physical: level the projector or reposition it so the lens is perpendicular to the screen. Use keystone only for the last few degrees, never as a substitute for proper placement.
Vertical keystone is far more forgiving than horizontal. If you must correct, correct vertically and solve horizontal distortion by rotating the projector itself.
Signal, Source, and Firmware Fixes for Blurry Images
Sometimes the projector is perfectly focused and the blur comes down the cable, where a surprising number of "soft image" complaints actually live.
Why a Bad Signal Looks Like Bad Focus
A digital signal either arrives intact or with errors, which show up as sparkles, dropouts, banding, or softness the eye reads as defocus. The mechanism tells you where to look.
HDMI bandwidth. 1080p at 60Hz needs roughly 4.5 Gbps of the 10.2 Gbps a High Speed HDMI cable carries; 4K at 60Hz with HDR pushes past 18 Gbps and needs Premium or Ultra High Speed (hdmi.org). A 1080p-rated cable asked to carry 4K often negotiates down to a lower resolution or refresh rate, that downshift produces the soft image.
Chroma subsampling. When bandwidth is tight, sources fall back to 4:2:0, throwing away color detail so text and fine edges look softer even with correct focus. Use 4:4:4 or RGB if your source offers it and the cable can carry it.
EDID handshake. Projector and source exchange a capabilities list (EDID) on connection. A bad handshake can send a resolution the projector doesn't natively support, forcing scaling. Check the projector's info menu: if the incoming resolution doesn't match your source's output, the handshake is the problem, not the optics.
Cable length. Passive HDMI cables over about 15 feet become unreliable at high bandwidth (hdmi.org). Use active optical or fiber HDMI for longer runs, a 25-foot passive cable that worked at 1080p may fail at 4K, often as softness rather than a black screen.
Source Resolution and Scaling Chains
Check these in order:
- Source resolution. A 720p streaming stick feeding a native 1080p projector forces upscaling, which softens detail. Match the source to the projector's native resolution.
- Scaling chains. Every device that scales adds a generation of softness, 1080p into an AVR upscaling to 4K into a projector downscaling to 1080p is three scalings. Set every device to pass through without scaling where possible.
- Aspect ratio. A mismatch stretches or letterboxes the image, making edges look soft.
- Refresh rate. A mismatch can introduce motion blur that looks like focus drift in fast scenes. Match the source refresh rate to the projector's native rate.
- Picture processing. Aggressive sharpness, noise reduction, and motion smoothing can soften the image. Turn them off or to neutral before troubleshooting focus.
Firmware and Auto-Focus Algorithms
Check the manufacturer's support page for firmware updates. Auto-focus and keystone algorithms improve in later releases, and stale firmware leaves you fighting patched bugs, especially on motorized-focus projectors, where firmware controls the focus motor's step size and hunting.
Update firmware over a wired connection if possible, a dropped Wi-Fi connection mid-update can brick the unit, far worse than a soft image.
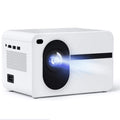
For the brightest, most forgiving results in rooms with any ambient light, the CAIWEI Halo 300 Ultra-Bright Projector holds a sharp image even when the room isn't fully dark, which reduces the temptation to over-correct settings you shouldn't touch.

Environmental Factors: Ambient Light, Heat, and Dust
Ambient light doesn't blur an image directly, but it destroys perceived contrast, and low contrast reads as softness. A picture crisp in a dark room looks muddy with a lamp on; blackout curtains or a high-gain screen solve this better than any projector setting.
Heat is the silent killer of image quality: blocked ventilation lets internal components expand and optical alignment drift. Give the unit a few inches of clearance on all vented sides and never stack it in an enclosed cabinet.
Dust is a close second: internal dust causes permanent soft spots and flare no external cleaning can fix. A simple schedule prevents it:
| Interval | Task |
|---|---|
| Weekly | Wipe the lens with a microfiber cloth |
| Monthly | Clear vents with compressed air |
| Quarterly | Check and clean the air filter |
| Annually | Inspect the lamp or light source hours |
For backyard movie nights where evening light lingers, the Karnstar Outdoor Cinema Projector includes a 200-inch screen and enough brightness to cut through ambient light without forcing you to overcorrect focus and keystone.

Conclusion
Blur is solvable, and the fix is almost never the one people try first. Check source resolution and cable before the focus ring, clean the lens before keystone, and place the projector correctly before digital zoom.
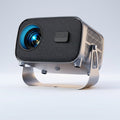
For a setup that handles most of this for you, the Wanderlight Portable Smart Projector pairs built-in WiFi and smart TV streaming with a compact body you can move room to room, so you're never locked into one imperfect placement.
Frequently Asked Questions
How to make a projector image less blurry?
Start by adjusting the focus ring or using auto-focus. Check that the projector is at the optimal throw distance for your screen size. Clean the lens with a microfiber cloth. If blur persists, verify the input source resolution matches the projector's native resolution and update firmware. Reducing ambient light also improves perceived sharpness.
Why does my projector keep unfocusing?
A projector may lose focus if the focus ring is loose or internal gears are worn. Auto-focus systems can drift if the projector moves or the room temperature changes. Ensure the projector is on a stable surface and not overheating. If the issue continues, check for firmware updates or contact support for hardware maintenance.
Does the distance between the projector and screen affect blur?
Yes, distance affects focus and image size. Each projector has a throw ratio that determines the ideal distance for a given screen size. Placing the projector too close or too far can make it impossible to focus sharply. Use the throw ratio formula and adjust placement until the image is crisp without digital zoom.
Can a dirty lens cause projector image blur?
Absolutely. Dust, fingerprints, and smudges on the lens scatter light and soften the image. Clean the lens gently with a microfiber cloth and lens cleaner. Avoid abrasive materials. Regular cleaning as part of a maintenance schedule prevents blur and keeps the picture sharp.
Getting a genuinely sharp picture shouldn't require a technician or a weekend of tinkering. JoeMo Promo handpicks projectors with automatic focus and keystone correction, rotating stands for flexible wall or ceiling placement, and wireless speaker connectivity for a clutter-free room, plus free shipping on most orders within the Continental U.S. and a 30-day return policy if the setup isn't right for your space. Shop the collection and turn any room into a private theater.